PHOTOGRAPHY TIPS AND TUTORIALS FROM HURRICANE IMAGES INC.
POWERFUL INTIMATE VIDEOGRAPHY / PHOTOGRAPHY | www.hurricaneimagesinc.com

Showing posts with label Lighting. Show all posts

Monday, January 6, 2020

A Focus Pull-Whip for High Speed Video

How do you pull focus perfectly from A to B in less than 1/20th of a second?  Faster than the wrist can rotate?  The technique is eye-opening, and surprising part is that any filmmaker can do it... it's a zero-budget tool.

I love filmmakers who are constantly innovating and pushing limits.  It's rare to find one, though, working at the top of his field where mistakes can cost tens of thousands of dollars.  Director/Cinematographer Matthew Rosen is one of those people, and he's generous enough to share many of his techniques for doing the seemingly impossible.

Rosen accomplishes the feat with a simple strip of gaffer tape.  The trick is that the camera needs to be positioned at the exact end of the lens's focal range.  (Though, I imagine if you were using a focus pull wheel with an hard stop, you could work anywhere within the range.)  Check out his video to see it in action, and by all means subscribe to him on YouTube.  The content comes slowly, but each tutorial is a real gem from a working professional.


Thursday, March 21, 2019

Aputure Fresnel 2X Review: Uh-oh.


I’m not usually the first one to buy a new piece of gear.  I’ve pre-ordered something maybe twice in my life.  But when I heard about the Aputure Fresnel 2X I thought… this is the kind of design mistake I can get into.

I was really excited about the possibilities of this tool.  The Aputure Fresnel 2X is designed to fit onto any Bowens mount light and increase its output anywhere from 2 to 14 times it’s maximum.  It’s a Fresnel, which means it’s focusable, from  40 degrees to 12 degrees—at least according to the literature.  It’s a design mistake, in my opinion, because it essentially turns any cheap 60-100 watt light into a monster, able to compete with the likes of the thousand-dollar Aputure 300d.

Of course, I was wrong about that… and that’s a big problem.

Video Review

Aputure implies that this will work with any Bowen’s mount light, and to be blunt, it doesn’t.  I don’t own the Aputure 120d, the light it was specifically designed for, so I don’t know how its construction differs.  But in my tests with two cheap lights, the Zuma LED60 and the RPS Studio 100 watt light, the unit just doubled the light, increasing by one full stop.  Now that’s not bad, and it’s within Aputure’s claims, but that wasn’t the only disappointment.  On the RPS Studio, it failed to act as a Fresnel.  The beam didn’t widen or narrow—it stayed at what I suspect is about 12 degrees.  On the Zuma I did get it to open up some, but not to a full 40 degrees.  And the Zuma light had another problem: you could make out the bi-colored LEDs when the Fresnel was zoomed in.  Really ugly.


12 Degrees Will Trip You Up


Now you may think, “well, it does double the light so it’s worth it.” But the 12 degree angle is a problem.  You can’t really shoot it into a scrim or bounce card, because the beam is too small at 3-5 feet away.  To fill up the card, you have to back the light even farther, thus reducing the amount of light that reaches your subject.  This takes away the one stop of light you gained. Remember, if you double the distance between subject and instrument, you half the amount of light.  And 12 degrees is less than a third of 40. The beam is so narrow at that distance, that I suspect it will even have problems in a softbox, when used on a third party light like the Zuma or RPS. It’s also a pretty big attachment, so it’s not something I’d want to carry around if it wasn’t a flexible tool.


At this point, I’d love to see some real world reviews of the light on the Aputure products to understand whether these limitations are just for other brands, or if it doesn’t fully perform up to spec.  There’s a reason Aputure makes such a wide claim of “2 to 14 times” the output.  The design of the Fresnel 2x appears to be based on a very specific light design. I’m sad to report these findings because I’m a big fan of Aputure.  They make quality goods at a decent price.  But the Fresnel 2X isn’t something you can use on non-Aputure products, and that’s extremely limiting.  Leave me a comment if you’ve had success with the 2X on other third party lights.


Saturday, March 9, 2019

The Zuma LED 60: Killing the Killer Godox SL60 and the Aputure 120D


www.HurricaneImagesInc.com


The Godox SL60 has been called the Aputure 120D killer.  But can the Zuma LED60, a lesser known knock-off, kill the Godox?  That’s a lot of light deaths already.

I was thinking about getting the Godox as a cheap secondary light, when I came across the Zuma LED60.  At $85.46 including shipping and tax I thought… why not?

You can watch the video version of this review, or keep reading....  


To be fair, I don’t own the Godox or the Aputure, so  this isn’t a comparison video.  But the questions about value are the same, so here we go.

The ZUMA is a quote-unquote "cheap Chinese knock off."  But that doesn’t necessarily mean its lower quality.  Almost everything is made in China, so Chinese companies have the option to pick and choose higher and lower quality goods to design the product—and price point—they want.

Too often, we think about the value of a light only as a key light.  For a good key, we need excellent color, silence, power, and flicker-free illumination.  Portability and ease of set up are helpful, too.  But we don’t need great color or silence on our rim, ambient, or environmental lights.  If it's not serving as your key light, the thing a secondary light has to be is flicker-free. I use a lot of different light-- large lights, midsized lights, small lights of varying quality throughout a set.  So I was willing to experiment with $85 to see if the Zuma had a place in my kit.

The Zuma is a daylight balanced LED that actually has a great form factor for this type of fixture.  It’s really small, just slightly larger than its reflector.  It’s all metal—the only plastic is the back handle and the lever.  It doesn’t require a power brick or converter.  And it’s a Bowen mount, which allows for professional modifiers. The only bummer is that the light cover is about twice the size it needs to be, taking up extra space when packed.  And there is no case for it, which might be handy.

I compared this light to my key light, the Falcon Eyes RX 24 TDX.  The Falcon is a high quality, powerful light that I personally love, despite the ridiculous power brick and portability issues.  To my surprise, at full power, the Zuma matched the light output of the Falcon Eyes.  At three feet, I metered ISO 200, shutter 60, and an aperture of 5.6 on both lights.  That’s roughly 5300 lux at 1 meter. The beam and spread are different, of course, with the Falcon Eyes being a bigger, more flattering light, and the ZUMA hard light that will require a modifier in most situations.  

  
Falcon Eyes 24 

Zuma LED60

I don’t have a spectrometer, so I compared the color on a RGB scope.  I filmed this with a Sony a7sii, which is notorious for color shift, so I didn’t expect perfect greys out of either light.  Sure enough, my Falcon Eyes dialed into 5600k had higher blue and green levels on the scope.  Now the Falcon is known for excellent color rendition, so I believe the uneven RGB lines is due to the Sony.  To my surprise, the Zuma had a nearly identical image.  The Falcon is a large panel, so the light fell evenly across the grey card (resulting in a flat line on the scope); whereas the Zuma is slanted due to light fall off-- not color quality.  The Zuma, in fact, is closer to perfect grey in the scope.  But in all honesty I don't know if there is "too much" red in the Zuma, due to Sony's strange color rendition... other cameras might see the light differently.

During my color test, I was standing about eight inches away from the Zuma.  I actually had to turn the light back on after the test in order to listen for fan noise.  It’s really quiet.  Professionally quiet.  Unless you've clamped your mic to the light, you're not going to hear it.

In a 20 minute heat test at full power, the ZUMA didn’t warm up, either.

The Achilles Heel of cheap LED lights is flicker.  That’s because cheap LED’s pulse at lower light output in order to reduce the amount of light.  They’re really firing at full power, and reducing the amount of light by interrupting the flow.  This means that when you shoot at higher frame rates, you can catch the dark portion of the pulse in the frame, creating flicker.  I couldn’t recreate flicker with the ZUMA. Even shooting at 10% power and 500 frames per second, I didn’t see any.  Which suggests that the ZUMA isn’t using a pulse to reduce output.  

I haven’t had a chance to use the ZUMA in a real world setting, but I was impressed that it performed so well in a studio test. The ZUMA isn’t just a solid secondary light.  It can perform as a key light.  The only real question left is durability.  Will the light hold up over time?  Obviously, the worse case scenario for any professional is to show up on a shoot and have your main light fail.  Full disclosure, this is my second light.  The first one showed up dead on arrival.  This one had an extra fuse in the box, so I suspect the first one had a dead fuse.  The light is all metal, doesn’t rattle, and doesn’t heat up, so there’s no real reason to suspect it will fail, but I can’t speak to the internal wiring and components.  

I probably won’t use the Zuma as a main light just because the $550 Falcon Eyes is more versatile… it's bi-color, and has a soft box attachment. It is possible if I was traveling and didn’t have space for the Falcon, working in hazardous conditions, or I knew I would have only a minute to set up, I would grab the Zuma one instead.  As a secondary light, I’m really looking forward to putting this little guy into play at Hurricane Images.


In sum, at $85 on Ebay, it’s hard to go too far wrong with this light.  It's powerful, silent, small, keeps its cool, and has very good color rendition. It’s a great choice for beginners and professionals who want to add to their kit.  


Wednesday, July 25, 2018

Hurricane Images Interview Demo


In the beginning I thought demo reels were a waste of time-- both as a producer and a viewer.  Showing just the best bits, there's so much more that determines whether a video is good-- story, editing, and performances.  As a photographer, I would post links to the top 20 images from a single wedding, so that couples could get a real sense of that to expect.

But lately I've decided that they do have some purpose.  Yes, there's showing your very best bits quickly and concisely, but more helpful I think is to show "boring" things in interesting ways. 

Unless your interested in the subject matter, interviews are pretty boring.  But they're also the centerpiece of many commercial videos and documentaries.  They're vital to Kickstarter/Indiegogo/MicroVentrues campaigns, tutorials, and company intros.  If you're a business owner, entrepreneur, or artists, you should be paying close attention to the quality of the interview technique.

We created our Interview Video Reel so that prospective clients could quickly see what our work, and learn a little bit about what makes an interview stand out from the technical standpoint.

Monday, April 3, 2017

CAME-TV Boltzen 55w Fresnel Review

Light.  You can't have too much of it.  Of course, when you really think about it a good video light is a technical marvel.  It needs to produce a lot of light, silently, with excellent color rendition, and no flicker.  I was hopeful when I heard about the CAME-TV Boltzen 55w focusable LED Fresnel.  I wanted a powerful light, and Boltzen came with some add bonuses (which I'll get to in a moment).  So how'd it stand up in real life?

CAME-TV Boltzen 55W Fresnel - It's tiny!

CAME-TV:  CAME-TV doesn't play with the big boys in high end gear like Wescott, but they are a name you can trust.  They produce quality gear at a relatively reasonable prices, and typically aren't considered innovators. The Boltzen is something of a bargain in the their line up, and is surprisingly innovative in design.

Size:  The first thing that surprised me was how small it is.  The Boltzen is about the size of an extra large travel mug.  It would be easy to pack six of these in a carry-on suitcase, making it great for traveling.  Light stands are now the burden for the mobile videographer.  Extra bonus:  built in barn doors.  Some folks expect they will give sharp defined edges to the light, but that's just not how Fresnels work (that's the job of an Ellipsoidal).  This is more gentle shaping.

CAME-TV Boltzen 55W Fresnel Review - Hurricane Images Inc
CAME-TV Boltzen 55W Fresnel

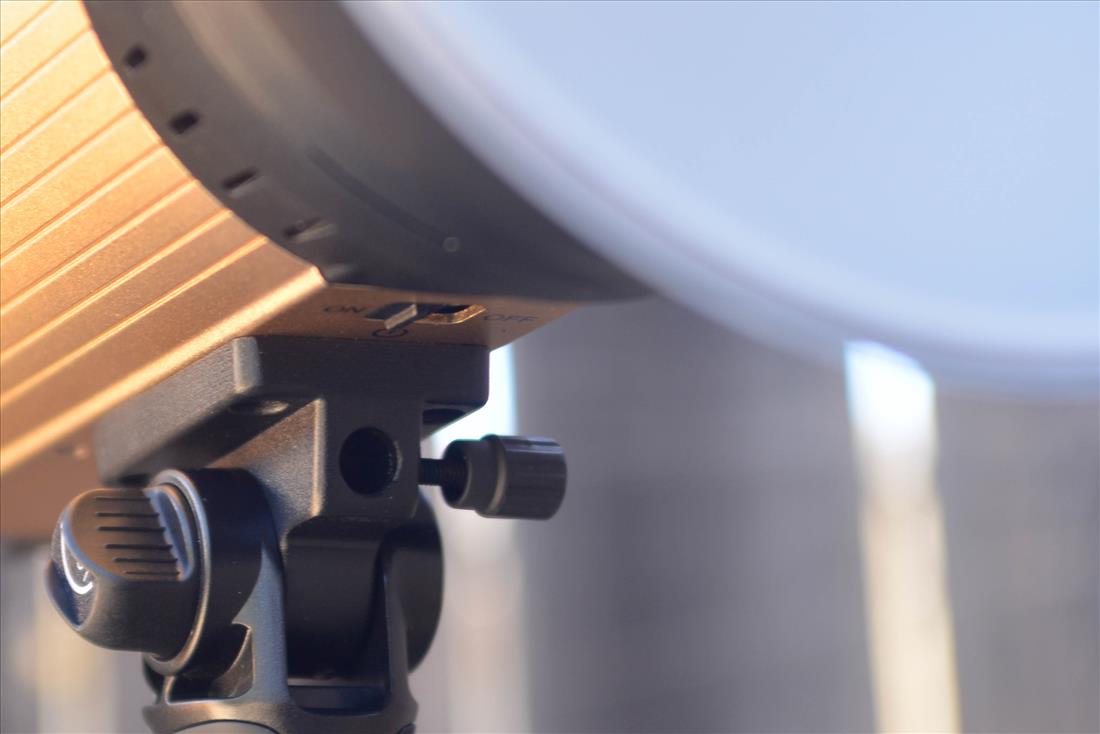
Construction and set up:  They feel very sturdy.  You never want to throw a light around, but I don't get the sense I'll have to coddle it.  It has separate On/Off and light level knobs, which is nice because you don't have to guess the level if you turn it off to conserve power.  Some buyers have complained that you have to disassemble the light from bracket to fit it into the carrying case.  It's true, but honestly it took me 60 seconds to set up the first time.  Slightly more troublesome, though, is that the bracket nobs come complete off, leaving the possibility they'll get lost.  I may try and find a way to attach them.

Locking mini XLR power cable

Another very slight downside is that the length of the power cord to the brick is fairly short, leaving it dangle in mid air.  I tied my to the light stand with one of the wire twisties that came with the packaging.  The cord locks into the light, which makes some folks happy about the solid connection and others nervous about kicking the whole thing over.

"The big question is power"


But the big question is power.  I haven't seen any reliable specs on lumen, but I'm more of a practical application person anyway.  I set it up against my RPS Studio 100w LED for a real world comparison.  The RPS is a very good light for the price (about $280), though it suffers from light fan noise (I've yet to swap out my fan, which is recommended).  At distance of six feet, a shutter speed of 1/60th, and an ISO of 500, my meter reads f/8 for a perfect exposure with the RPS on full.  In the same conditions, the Boltzen gave a reading of f/5.6 wide open and f/8 with the narrow beam.  Which is impressive, given it's just 55 watts.  Housed in the reflector, the RPS produces a wider spread of light than the Boltzen, so that's where the additional wattage is going.  But if you don't need the spread, the smaller Boltzen provides just a stop less light wide open.  The narrow setting on the Boltzen is really quite narrow.  I'll be interested to see what happens in a softbox or reflective umbrella, because it's very small and hard otherwise. I haven't done a direct comparison yet, but the CAME-TV seems to be about as powerful as my Apurture 672 panel, with slightly better color rendition.

CAME-TV Boltzen 55W Fresnel Review - Hurricane Images Inc

The color of the light between the RPS and the Boltzen seems quite similar.  I don't have a way to test for color accuracy, but I don't see a tint as yet.  And daylight temperature is a bonus-- you don't find that in real Fresnels which are traditionally tungsten. 

The fan is very quite.  In fact, I thought they had sent me the 33 watt unit without a fan.  I had to go back and listen for it. The fan will probably be noticeable if you have three lights going in a small room, but I don't think you can do better without going fan-less. Mic well and you'll have nothing to eliminate in post.

Wifi.  There's a mysterious reference to Wifi (and a micro USB plug) on the unit.  I've downloaded the app (which appears to be new as of March), but there are no instructions and it doesn't auto connect.  UPDATE:  I emailed the folks at Came-TV and they said they are working on a wifi module that will attach the the Boltzen.  Shame that it's not built in, but even so it has the potential to be very useful.  The app appears to be able to control six separate lights, and it would be great to be about to adjust levels while looking at your monitor.  I imagine future versions of the Boltzen will have wifi built in.

Those bonuses:  Smaller than I thought.  Barn doors help shape the light.  Separate Power and Level knobs.  It can run off a Sony NP-F960 battery, but you need to get the larger capacity version.  My 8700mAh only lasted about 40 minutes at full power, but that's still great in a pinch.  Oddly, my battery barely fit and I really had to wedge it in the slot.

Though a full stop weaker, the Boltzen is a smaller, quieter, and more adaptable light than 100W studio lights like the RPS.  At the moment, light in the $300-$400 range will generally be 55-100 watts, which is only the difference of one stop of light.  The difference between your choices are all about build quality, color quality, and features.  In that respect, the Boltzen does very well. 

CAME-TV has a solid reputation, and they get a lot right here.  It's a solid, professional instrument, and I could see owning two of them at Hurricane Images.  They make a Bowen adapter so you can attach it to softboxes, reflectors and grids, though I'm more likely to shoot through a scrim since the Fresnel-style Boltzen can "grid" itself. 

CAME-TV Boltzen 55W Fresnel Review - Hurricane Images Inc

The CAME-TV Boltzen 55W Fresnel review:  worth the money, especially if you like the form factor.

Wednesday, May 18, 2016

Nailing Perfect Exposure in Lightroom


I'll be the first to admit that I have a problem nailing the perfect exposure for the final print, especially if that print is on paper.  Personally, I tend towards moodier images with more dark tones.  Computer monitors generate light, so images usually appear brighter on screen than when printed.  Combine my "mood" with physics of light and you can end up with seriously unhappy client.

Almost all non-professional printers (like those at Walgreens) auto adjust the exposure because of this.  So in many cases you're saved by technology.  But professional printers often don't (it's a mixed bag), and it's always better to be in control of your own exposure.

The rule of thumb I sometimes hear is to find the exposure you like, and then increase it between 1/4 and 1/2 stops when sending to the printer.  That's a good rule of thumb, but I think I've found a more precise way to ensure the skin tone in my portraits are properly exposed.  If we follow the Zone System, we know that skin tones should be between Zones 5 and 7 (depending on skin color).  I've always been annoyed that the histogram in Lightroom doesn't change when you zoom in, but it does change when you crop the image.  So to perfectly expose skin you simply need to crop in:


Then adjust your exposure watching the histogram.  The histogram is divided into four sections.  Perfect skin tones will reside between the mid point (Zone 5) and the third line (essentially Zone 7).


You can adjust the exposure while still in the Crop Mode, and then re-crop the images to taste.

Now for a quick tip:  while in the Develop Module, when you put your cursor over an area the histogram doesn't change, but the numbers below R, G, & B, will show their values.  You can quickly check the exposure by hovering your mouse over the area. 

Friday, April 24, 2015

George, My Dead Body

How do you lug your equipment around?  As a one-man operation who often brings six light stands, two light boxes, two backdrops, a crossbar, boom, two large reflectors, and a tripod along with two camera bodies, four lenses, and three flashes, this question has plagued me.  The real solution would be to stop bringing so much stuff and learn to work my surroundings better.  And I'm moving in that direction.  But sometimes you have to bring a full studio with you.

So I started thinking outside the box.  Photography equipment is expensive, and that goes for good quality luggage as well.  I wanted something big enough to house my 45" cross bar, have wheels for rolling, handles for carrying, sturdy enough to hold 70 pounds of odd shaped equipment, and yet be somewhat compact for storage. The answer came, strangely enough, in the form of a golf bag.  I chose the CaddyDaddy Constrictor 2 Golf Bag Travel Cover. Despite its name, it's not a cover but a full bag.  I can fit my smaller light stand bag (with 4 light stands), plus two additional light stands, my big tripod, two collapsible light boxes, two 6-9 backdrops with cross bar, three umbrellas, a travel bag of equipment doodads is the side pockets, and still have room for a small electric fan. It's huge and heavy, but it has rollers.  I only wish it had a shoulder strap... but then again maybe not.  It's really heavy.  For $80 it does more and costs less than traditional photography luggage.  I call it George, my dead body. 

Wednesday, April 15, 2015

Pleasant Surprise with the Ice Light Alternative


I have no doubt the folks over at Wescott won't be pleased with me, but then I'm sure they saw this coming.  With any popular new "invention" in photography, it's inevitable that a Chinese knock-off version will appear (let's face it, most of the original versions are made in China anyhow).  Over the past few years, Chinese manufacturers have seen the benefits of making these knock-offs with quality in mind, and become savvy at avoiding copyright issues.  So how does the "Magic Tube Light"-- or MTL 900 II-- compare to its $450 progenitor?  First off, I bought mine for $115 shipped.

I'll start by admitting I've never handled Wescott's Ice Light, so a direct comparison is unfair.  But light has it's own baseline for comparison, and that is something we can examine.

Superficially, the Ice Light is considerably more handsome.  The MTL 900 II (marketed under various names) looks a little plastic-y, and it is.  But it has surprising heft in the hand and feels well-built. The 1/4 inch screw mount on the bottom is the one component that gave me pause.  I'd rate it a 7 out of 10 in terms of sturdiness.   I expect, though, with care it will hold up just fine.

The MTL 900 is approximately the same size as the Ice Light (IL).  It has 298 LEDs compared to the IL's 72.  Obviously, the LEDs are individually weaker, but together they produce 1600 lumens of daylight balanced light.  The original Ice produces 1200 lumens, and the updated version II produces 1600.  Both units are dimmable, with a 73 degree angle of light.  The angle and quality of light the MTL 900 produces is similar to a gridded 24" softbox: you have to keep it close to your subject, so the light is soft with a bit of directionality or bite.  Both brands will last about an hour at full brightness.

While the Wescott is clearly superior in terms of looks and finish, our Chinese friend has a couple of advantages over the Westcott.  The most important is the battery-- it uses a common rechargeable Sony battery that costs about $10 on ebay. You can buy a couple and have hours of working light.  The MTL also comes with a remote, which while handy you'll probably never use.

If all this sounds exciting, there's a very important caveat and it applies to both the $450 Ice Light and it's $120 Black Sheep: the amount of light and what that translates into in real life.  1600 lumens isn't a lot.  In real-world terms, with the MTL 3.5 feet from the subject, my camera settings are shutter 125, aperture f/5.6, and ISO is 500.  Obviously, you can open up your lens farther, but for single portraits the depth of field is already pretty shallow and for couples anything less than 5.6 is a hazard. It's also a continuous light, which means that balances room ambient and key light is difficult given how little power you have to work with.  Both the Ice Light and the MTL are best suited for indoor/studio and night time portraiture, and perhaps a little punch or fill outdoors during the day.

Limitations aside, I was pretty impressed with the MTL900 II-- enough that I immediately purchased a second unit and a pair of barn doors ($30 for the knock-off version versus $40 for the Wescott).  Indoors, the light is small, quick to set up, and can produce some lovely light.  The barn doors add great functionality, and the quality of light is interesting.

A couple of little quirks:  you can run the MTL on AC, but if the battery is low it won't go to full brightness until it recharges to some unspecified level.  The amber, 3200k filter is a nice additional, but it would have been so much smarter to have the piece half clear, half amber so that you simple rotate the filter rather than remove.


What's it look like in action?  Here's a portrait done with two MTLs (positioned above and below as you can see in the catch lights).  The lights are on stands with ballheads positioned for the horizontal.  It's a two minute set up and knowing the amount of light it produces (and thus my camera settings) the first shot was a keeper.


Monday, September 15, 2014

Day 87, Learning 87: Getting the camera to focus without hunting


I love my SB800 flashes.  I have three of them, all purchased used, and I rue the day one of them finally conks out on me because frankly, I don’t think Nikon has improved upon them with the 900 series.  Both of these top end flashes do something more than illuminate your subject.  You can use them to assist your auto-focus, even when you don’t want to use flash photography.

Even the best lenses will start to hunt back and forth for focus when light levels get too low.  Cameras focus based on contrast (which is why it will hunt when pointed at a brightly lit, but blank surface).

SB 800s and 900s have an “AF Only” (located in the AF Menu on the strobe itself) that turns off the flash.  It works best when your focus mode is AF-S, or “Auto Focus Single Servo” mode.

So the next time you want to engage in some available, low-light photography but need the auto-focus to work without hunting, give it a try.

Friday, September 12, 2014

Links Friday: September 12, 2014

This week's offerings:  Ever try to make a High Key portrait with just one light?  Martin Ziaja at Lighting Rumours shows you how.  Scott Kelby's Crush the Composition video, an hour-long presentation, started my foray into video learning; worth checking out.  "Defraction" is one of those concepts most photographers put off learning.  No better teacher to turn to than Cambridge in Color for an in-depth understanding. Serge Ramelli is one of the savviest indoor architectural photographers I know.  This video covers the basics to advanced techniques.

Monday, September 8, 2014

Day 85, Learning 85: Parabolic, Faux Parabolic and Plain Ole’ White Umbrellas


I’ve noticed that the marketing department has gotten a hold of the term “parabolic.”  Photographic umbrellas are popping up with that name rather generically attached to them, when they aren’t really parabolic at all.

True Parabolic
A parabolic umbrella is designed to reflect the light from a flash back in a focused beam.  They are always silver lined, and the intensity of light can be up to 16 times the light emitted from a softbox using the same flash.  The light itself is a unique blend: punchy, and at lower power will focus in a similar manner to a grid, with a gentle feathering into darkness.  For that reason, they tend to be pricey.  Parabolic reflectors have to be very precise to do this: a precise number of panels, precise depth in the umbrella, and precise placement of the flash to get the correct bounce.

Faux Parabolic
Well, really there are two types of faux parabolic.  One is a watered-down parabolic; the other just false advertising.  Umbrellas with a parabolic structure but lined with white interiors are of the watered-down variety.  The white interior spreads out and softens the beams; they’re only marginally more focused that plain ole’ umbrella.  

Sadly, some manufacturers are falsely labeling white umbrellas as “parabolic” for the sake of advertising.  White umbrellas do not focus the light, and therefore don't have parabolic qualities. White umbrellas with black backs do not focus the light or have parabolic qualities, they simply limit the "spill" that results from light passing through the umbrella.

Plain Ole’
If you compare your average white umbrella to a parabolic, it’s easy to forget they are great tools for shaping and softening light.  Don't disparage your plain ole white umbrella. For the greatest flexibility, get one with a removable black cover to better control the light.

What to Buy
There’s no reason not to buy a plain white umbrella.  They’re cheap.  They’re great.  For a destination wedding I actually bought a compact white rain umbrella.  It worked great and fit inside my carry-on.

If you’re going to buy a parabolic umbrella, my advice is don’t got half way.  You can get a white lined/black exterior non-parabolic umbrella pretty cheap, and they’ll perform much the same.  If you buy a parabolic, buy silver-lined and do your research.  Paul C. Buff’s PLM line are reportedly true parabolics, and they’re quite cheap.  Westcott is also known to be true, but pricey.  The tests I’ve seen on the Flashpoint silver umbrella looks promising, too.  There’s a quick test to see if it’s a true parabolic.  Set up your flash/umbrella and dial it down to its lowest output. Aim the umbrella at a blank wall.  Take a picture.  The illumination should feather smoothly into darkness.  Then take a picture of the inside of the umbrella (using your flash, of course).  The umbrella should be lit with distinct ribs-- not all white.

Friday, September 5, 2014

Link Friday: September 5th, 2014

Link Friday Returns!  There are a number of website that provide free brushes and textures for Photoshop.  If you don't know Qbrushes.net, check them out.  The Strobist website is one of the richest resources around for learning about flash photography (well, it's become a little introspective of late, but the resources are still available-- and awesome).  Download their free ebook, Lighting 101.   Ken McCordall is a veteran photographer, a working man's workingman.  He's got a nice set of tutorials on his website, including this one on photographing food.  Looking for a location for your shoot?  Shothotspot is awesome for that. 

Tuesday, September 2, 2014

Nicefoto 680W Strobe Review: An inexpensive, muscle-bound, wireless strobe


I pretty much never review products.  Mostly, this is because I rarely buy the newest, hottest gear.  I’m a big fan of top quality goods that are already a generation old:  my bag is stuffed with gems like Nikon 80-200mm f/2.8, the 35-70mm f/2.8, and SB800s.  But I’m making an exception today, both because the product is fairly new, but also because I think it’s an exceptional deal.

I posted earlier about lighting alphabet soup, which was essentially a summation of my purchasing criteria.  I wanted a bigger strobe than my SB800s, one that could compete with the sun outdoors.  I settled on the Nicefoto 680W.  “Nicefoto” isn’t the most confidence inspiring name to emerge from the smoky factories of China, but I’d read some good things about it and the specs were excellent.


The Nicefoto 680W is equipped with a rechargeable battery that other reviewers have found to get 400+ flashes at full strength. It comes with both an optical trigger and a built in 2.4GHz radio trigger.  The power goes from full to 1/64 in full stop increments.  There’s a modeling lamp, and cooling system.  And it utilizes IGBT technology, which means the flash has a very short T.1 time (up to 1/7,900th of a second) for freezing the action.  Great specs, and at $420 a good price, but how well does it perform?


Features and Build
First, 680 watts is blindingly bright.  There’s more than enough power for most people.  The unit is built very well-- very sturdy, well thought-out, fairly heavy, and all the parts fit together snugly.  It feels, in short, muscle-bound.  The Nicefoto has a host of thoughtful little features, too.  There’s a handle that folds down for your human light stand, and a hole with tightening screw for attaching to a non-human light stand. It also has a second small handle that flips out from the top to make it easier to hold while attaching to said stand. There’s strap, a cold shoe to clip your radio trigger, and trigger input.  The LCD is large and bright, and the button-interface simple. The only misstep in the design is the umbrella holder, which is at the top of the handle. The reflector and the umbrella post collide, making it impossible to use both at once.  


Considering how much thought went into the rest of the unit, it’s baffling and there’s no elegant work-around.  The reflector is a Bowen mount, though, which means there are plenty of attachments available (including reflectors with umbrella holes).


Both the optical and radio triggers work well.  It would have been nice if you could control the output from the trigger.  Another odd over-sight.  The trigger appears to be universal (it works on both my Nikon and my Pentax) and has a pass-through, which is a great bonus. I can control my other strobes from the camera. The simplicity makes it easy to use, quick to set-up, and really a joy so far.  The modeling light is decent for checking your shadows, but too weak for anything else; it’s daylight temperature, just in case 35 watts is enough for your project.

Quality of Light
Independent testing by the folks over at www.lightingrumours.com verify that the color temperature is 5600; it rises to a slightly bluer 6300 as you decrease the power to 1/64th.  That’s pretty accurate in my book.  Recycle time is about 4.5 for a full pop, and the output is consistent.


Like your hotshoe flash, the IGBT flash times shortens as the power decreases.  In regular mode, the flash time decreases from 1/320th  at full to 1/7,600th of a second at 1/64th power.  There’s a FP mode for that clips it even sharper-- again with a commiserating loss of power.  There are five FP settings, the slowest (1/2000) is equal to about ¼ power.  The fastest (1/7,500) is pretty dinky.  Here’s the confusing part for me.  In my initial tests, the FB mode doesn’t appear to be any faster than the regular mode:  at ¼ power the flash fires at 1/1,600th of a second in regular mode.*  That’s virtually the same as the FB mode.  The FB mode appears to be a placebo for the most part, but it’s hard to complain because 1/7,500th of a second is very fast.

You’ll notice I haven’t mentioned HSS, only FB.  These two terms have merged into something synonymous and they’re not.  Frankly, I’m not sure what FB refers to anymore.  The 680W has an FB mode designed to reduce the flash duration.  HSS, on the other hand, greatly “lengthens” the flash duration by turning it into a serious of rapid pulses.  HSS is slightly more useful because it allows a faster shutter speed, thereby reducing the ambient light.  With “FB” (or a short flash duration) you use ND filters to reduce ambient light. The Nicefoto doesn’t have HSS capability, but it does have multi-flash, which allows you to program multiple distinct flashes for long exposure photography. It’s use, for example, is to show five distinct moments of a dancer’s movement without photoshop.

Conclusion
All in all I’m impressed with the Nicefoto 680W, and I’m looking forward to spending some time with it in the field.  The wireless design and handle makes it very efficient, and it performs just as promised.  Comparable strobes costs $100-$400 more, which is why I decided to post a review.


*I’m metering the light output and utilizing the flash duration charts supplied by Nicefoto.

Thursday, August 28, 2014

Day 84, Learning 84: Color Rendering Index for Buyers

Producing light is complicated.  I wrote about the alphabet soup of power and speed in my last post, but there's also color.  After you figure out color temperature and how to use it to your advantage, you might find that knowledge is wasted because your CRI, or Color Rendering Index, is low.  Your "daylight" lamp or strobe may be producing 5600K light that looks like 4000K in camera because temperature isn't the only definer of color.

The reason isn't so simple.  Remembering that white light is actually a mixture of colors, it's possible to have the right mix of but each color is being produced unevenly.  Where Green is peaking, Red might be dipping.  Green and Red make Yellow, so there may be shades of yellow that are washed out or off-color.  CRI is measured on a hundred point scale, with 100 being the perfect rendition of color.  Your average fluorescent light may have a CRI between 60 and 70, producing very uneven light.

This is a real simplification of CRI, but to be honest I haven't found more complicated answers to be helpful.  When purchasing a continuous light source, you'll want it to produce daylight, 5600K, and have a CRI of at least 85.  Anything lower and I'd get squeamish.

Monday, August 25, 2014

Day 82, Learning 82: HSS, IGBT and other Lighting Alphabet Soups


There's plenty of acronyms in the photography world.  Generally, you don't need to be well-versed in them... until you're trying to buy a piece of equipment.  Then it's the difference between having the ability you want and being frustrated in the field.

Nowhere in the photography world is this more evident than in the highly technical realm of lighting, so today I'm going to write about a couple of terms that are important when choosing a studio strobe or flash.  First, a definition: by studio strobe I mean something other than a hot shoe flash.  There are numerous varieties and a jaw-dropping range of prices.  That's where deciphering alphabet soup becomes important.

Today:  GN, Watts-Per-Second, HSS, IGBT, and T.1 versus T.5.  Basically, every important consideration when it comes to assessing the light produced (not the fancy bells and whistles).

GN vs Watts-Per-Second
While hot shoe flashes general talk about power in terms of GN, watts-per-second is the lingo of choice among studio strobes.  For folks making the transition, there's not a neat way of comparing flash power to strobe power. GN isn't calculated in a very uniform way among manufacturers, and the reflectors and other modifiers make the same muddle of watts-per-second.  However, general rule of thumb is most hot shoe flashes produce between 50 and 65 watts-per-second.  That means a 100Ws strobe produces about twice as much light-- or 1 stop more light-- than your average strobe.  A small increase.  200Ws produce 2 stops; 400Ws produces 3 stops, or the equivalent of eight SB800s firing at once. 800Ws equals sixteen hot shoe flashes.

Let's put that in field-terms:  with an unmodified 400Ws strobe you can shoot at f/4, 100 ISO, 200 Shutter speed.  More or less.  That'll be some hard light-- add a scrim or softbox and you're shooting at about f/5.6.

HSS & Hypersync
HSS stands for high speed sync.  This is located somewhere above regular speed sync.  Why is it important? Nutty things happen when you start speeding.  Most cameras sync at either 1/200 or 1/250 of a second.  The Pentax 645D, alas, syncs at 125.  It works this way:  flashes are faster than 250th of a second.  Most hot shoe flashes range widely, from 320 to 1/40,000 of a second, depending largely on power: Full power equals slower flash. Lower the strength and you lower the flash duration. This is important because your shutter doesn't open all at once.  In order to move as quickly as it does-- sometimes with shutter speeds of 1/4000th of a second, it opens two parts, forming a moving slot that crosses the sensor from top to bottom.  If the flash duration is shorter than the shutter, then a portion of the sensor does not receive any light from the flash.

There are times when the object you're photographing is moving so quickly that a shorter duration than 1/200th is needed in order to freeze the action.  For this to happen, one of two things must happen: either the flash needs to be evenly distributed over time so the faster shutter can complete its action, or the flash needs to be shorter in duration so that the flash freezes the action.  In the latter case, you keep your shutter at 1/200th of a second and let the flash freeze the action.

For hot shoe flashes, the approach is to "lengthen" the flash duration by produces a series of rapid small flashes.  In doing so, however, the power is also reduced, generally to about 1/4.  If you're in bright light (i.e. outside) forget about it.  Your flash won't make a dent in the ambient sunlight.  If you're shooting indoors, this can be helpful if 1/4 power is what is needed: i.e., your ambient light is reduced by the high shutter speed and your aperture/ISO are sufficient for the flash.

Certain flash triggers provide another option for hot shoe flashes: HyperSync.  This process improves the alignment of the shutter and flash so that the sensor is exposed while during the tail of the exposure, rather than at the start.  This prevents a black band from appearing (due to the complete absence of light), but results in both less power and a gradation of light from top to bottom.

The other approach is favored by high end studio strobes:  shorten the flash duration using IGBT. 

IGBT Technology
A traditional studio strobe has a sharp spike and a long tail as the light dwindles. Half of the total amount of light it produces occurs in the tail. This isn't good for high shutter speeds which cut off before the tail is completed.   To freeze action, you need the light cut off like a switch rather than the shutter.  Enter IGBT technology.  Used with longer shutter speeds in darkened environments, IGBT lights release a burst of the power that stops abruptly.

T.1 versus T.5
These aren't Terminator movies. The flash duration of studio strobes are typically discussed in terms of T.1 and T.5 amounts.  T.5 levels refer to how long it takes for half of the light to be released, and are generally useless.  A strobe with a fast T.5 (the first half of the light produced) can have a very long tail.  T. 1 refers to the time it takes for 90% of the light to be released.  This is the measure you should be following. Different strobes have different T.1 times.  Alien Bees are great reliable lights, but slow. My NiceFoto nFlash 680WS strobe has a T.1 time of 1/1,400th at 1/4 power.  Not the fastest of IGBT strobes (or the most powerful), but that is the equivalent of two SB800s firing at full power.  Strobes with high watts-per-second can be very useful in reducing ambient light outdoors, too.

Bottom Line: What do I look for?
Everything is a balance of cost, ability, and reputation.  In the realm of ability, you want a strobe high watts-per-second (400Ws would be the minimum) and IGBT technology that creates a short T.1 time.  Hot shoe flashes all have IGBT technology, so flash duration isn't a factor; they also all have fairly low watts-per-second-- calculated as GN-- making them useful in enclosed areas but problematic outdoors or when photographing large groups.  After those functional elements, I'd consider bells and whistles-- do you want built in power, trigger, or faster recycle time?  Having a traditional hood mount, such as a Bowen, is helpful with accessories.  Reputation is a harder call. For the risk adverse, stick with the established brands like Einstein, Alien Bee, Profoto, etc.  However, whether they are more reliable than many of the better-known Chinese imports-- Mettle, NiceFoto, Neewer, etc.-- is yet to be seen.  And the fact that it's not clear already says something positive about the import quality. 

Monday, July 7, 2014

Day 78, Learning 78: Low Light's Forgotten Variable


One variable in low light photography is rarely-- if ever-- mentioned.  I've avoided discussing low light photography because the subject is thoroughly tutorialized on the web.  And the theory and advice is fairly basic:  essentially, open your aperture as wide as possible and increase your ISO until your shutter speed is sufficiently fast to eliminate blur.  Of course, we're not talking about working with flashes, night time landscape photography, or image editing, simply available light photography.

Then yesterday I saw a video tutorial on the subject, and after the instructor took a number of demonstration shots, he said: "the only thing I'm not happy with is my angle of view so I'm going to switch to a zoom lens."  He did not say that he was manipulating the fourth variable in low light photography.  Frankly, I don't think he understood that he was doing so. 

The reason I say this is because he was already shooting hand-held at f/2.8, ISO 3200 (ugh), and a shutter speed of 50.  His lens was a 28-70mm.  The old rule of thumb is that your shutter speed should be equal to or higher than the millimeter on your lens to avoid motion blur.  This is truly a "rule of thumb."  Some people have incredibly steady hands.  Or shaky ones.  As lens vibration reduction technology becomes more sophisticated, we can shoot at lower and lower shutter speeds.  But while the exact shutter speed may differ from person to person, what doesn't is the relationship.  The longer the lens, the faster the shutter speed needs to be.  He had already identified 1/50th of a second as the slowest he could shoot; in reaching for his zoom he'll either have to increase his shutter speed (and thus is already painful ISO) or accept blurrier images.  Or grab his tripod as well.

The "forgotten" variable in low light photography is focal length.  When shooting hand held, don't just reach for the fast glass, reach for the wide one as well.

Monday, June 16, 2014

Day 75, Learning 75: Light as Time Travel

"Wait a minute, Doc.  Are yo telling me you built a time machine... out of a DeLorean?" ~ Marty McFly, Back to the Future.

We think of light in many ways: sheer illumination, texture, drama, and artistry.  We first learn to light the subject, and later the environment.  Then we return to lighting the subject with greater nuance.  Today I'd like to think of light as time travel.  By that I mean  light can place a moment in any time of day (or night).

Our minds are so accustomed to interpreting light that it's completely unconscious now.  We see long, sideways shadows and immediately understand the time to be early morning or late afternoon.  Short shadows indicate noon time.

Hurricane Images Inc time travel photography

Even though we can't see these women's shadows on the ground, there's no question that the sun is either rising or setting in this image.  Which do you think it is?  If you guessed sunset, you'd be right.  But how did you know?

We can re-create that time of day using flashes or continuous lights.  The well-advised adage is "when the sun is high, place your subject in shade."  When that shade is too dark (say, beneath a large building) the resulting image can lack contrast.  Adding a flash can give your images vibrancy, depth, and also a place in time.

The image below looks natural, but there's a Nikon SB800 in a 24" soft box camera right to give it a little more oomph.  Notice the soft shadow under her chin and camera left.   For this portrait, I wasn't concerned with time (though from the bright spot on the wall immediately behind her we might guess that it's late afternoon).  I was focused on depth and texture.  Our minds, however, are seeing time in the picture.  The light is imitating mid day under a light shadow; only the rectangle of sunlight on the wall behind her head (camera right) says otherwise.

Hurricane Images individual portrait session for N

Time of day isn't just shadows, though.  Long shadows without the corresponding change in color temperature will look fake.  Mismatched light temperatures are an annoyingly common mistake when photographers combine flash portraits with sunsets.  The color temperature on the model is 5200K, while the sunset light is closer to 2000K (the solution: gel your flash-- you can correct this problem in post but it's a pain).

Once you've created your shadows, adjust your color temperature.  Flash is a daylight temperature of 5200K.  Warm it up to 3500K with an orange gel and see how much more natural your sunset portraits are. The difference in light temperature between sunset (roughly 2000K) and your gelled flash (3500K) will make your subject stand out without appearing unnatural.

Now that you're attuned to time-cues in images, browse Flickr, Instagram, or your favorite photographer's website and practice identifying the elements that create time of day, and the mood it evokes.  Check out mine, www.hurricaneimagesinc.com, and let me know what you find.

Wednesday, June 11, 2014

Day 74, Learning 74: Playing with Shadows


There are a number of techniques for isolating and manipulating just the shadow-- or under exposed-- areas of your image. This one is a favorite, because it you have complete control over the area and the ability to work with any number of tools.

I like the low-key quality of the image above, but her black hair disappears against the black drop.  I could have added more rim light, but that wouldn't have teased out the texture very well.  Or I could have increased the front light, but then I would have lost the moodiness of the low-key.  If I had really wanted to be finicky during the shoot, I could have added a front hair light, and lowered the more general light on her face to compensate.  If you remember your light theory, you'll recall that light is additive.  But this wasn't an advertising shoot-- I didn't have half an hour to fiddle with one shot. So what can I do in post?

First-- as always-- duplicate your layer.
Second-- you need to select just the shadow areas.  If you press Ctrl + alt + 2 on your keyboard, you'll select just the bright areas.  On older versions of Photoshop I believe it's Ctrl + alt + ~ but they changed this shortcut more than once.  If neither of those work for you, google that command with your version of Photoshop.  This will select the highlights as shown below.


 The great thing about this command is that the brighter the pixel, the more it's selected.  In other words, it's a gradation.

Third-- reverse (or inverse) the selection:


Fourth:  Hit "Q" and you'll see your selection mask in red.  The great thing about this tool is that you can use your paint brush to modify the selection.  Because I'm removing areas from the selection, I'll use the brush with Black paint.

 I want to make sure her skin tones and the richness of the black background remain unaffected, so I painted over them, turning the masked (unaffected) area dark red.


 Hit "Q" again (I often forget this step) and you'll see the new selected area; the selected portion is still a gradation: the darker the pixel, the more it will affected by our next adjustment.

Fifth:  Duplicate the layer using Ctrl J.  Now you have a new layer of just the shadow area you want to manipulate.  You can use Levels, or any other approach.  Here I did something even simpler: I changed the Blend Mode to Screen, brightening everything dramatically.

 Now you can compare the original image to the final.  Suddenly we can see texture in the front  of her hair.  We haven't lost the tonal quality of the shadow on her cheek, which was the goal.


Monday, May 19, 2014

Day 70, Learning 70: Making Eyes Pop

In many respects, eyes make the photograph.  They are the one thing that is always supposed to be in focus (traditionally, though there is the occasional brilliant exception).  They are one of the main characteristics of beauty.  And in all honesty, they can be difficult to capture well in pictures, especially when you're working in natural light.  Overcast days can make for dull eyes.  Converting to Black and White can also dull them. 

So here's a Photoshop technique for making them pop using Color Dodge in Blend Mode.


Let's start with the original image above.  I haven't adjusted or touched it up in any way, so it has many issues.  We're going to focus just on the eyes, though.  Being dark, they were especially vulnerable to turning dull on our overcast day.

After you make a new layer, select both eyes.  I'm going to do just one eye so we can compare.


After you've selected the eye, you'll want to smooth and feather is slightly.  There's a "Refine Edge" button near the top of your screen for this dialogue box.


Then copy it into a new layer.  On that layer, set the Blend Mode to Color Dodge.


In most cases the result is extreme and you have to pull the transparency down to between 10%-30%; in rare cases you'll need to boost the effect by duplicating the layer.  The final result should be subtle but noticeable in comparison:


See the slight boost in color and vibrance?  This is much closer to how she was in person.